Richard is involved in an ongoing project to build mobile crane CNJ 4 from a Tichy Train Group kit 4010 – steam wrecking crane. In the images below, you can see the Tichy kit on the left and, on the right, a photo of the prototype taken from the CNJ/LV Guide to Freight and Passenger Equipment by Craig T. Bossler (1994) – now out of print but available 2nd hand.
Richard has now done most of the bodywork but still has to assemble and prepare the cables – It has now been painted and partly decalled. It’s looking very good! More photos will be added as this progresses.
Last week we set out all the stock and tested it in new consists and configurations. Everything (well nearly…) ran well and since then several items have been further weathered. Richard’s new K1s 4-8-0 has been completed and is running and photos also show an ABBA F3 set hauling a long freight Westbound. Other photos show the locomotive and other stock lined up in their fiddle yard roads.
Finally, the new fascia lettering is coming together!
We hope to see some of you at the Scottish Exhibition Centre on Friday through Sunday this weekend.
Work is still progressing on preparations for Glasgow – most of it in intensive sessions coinciding with Steve’s visits to Barrowmore from East Yorkshire.
Photos show Steve weathering boxcars with Pan Pastels, these were then sprayed with fixative and/or acrylic matt varnish. The spraying does fade some of the colours, particularly the brown and organge, but has the advantage of fixing them.
Richard continued making corridor connections for all the passenger cars from black card, scored and folded into concertinas then superglued to the car ends. A LOT cheaper than the commercial options and looks just as good.
Dave (Millwood) continued to help by ballasting the gap in the platform and making more of the cantilevered telegraph poles for the extended LH end wall. Steve also made and planted many more telegraph poles for the RH end and the front.
Richard replaced the broken plastic handrails (they are so fine) with brass wire equivalents on half a dozen small tank cars – a substantial task. Gavin airbrushed the latest K1as camelback prior to decaling.
Finally the stock was set out to arrange train consists prior to reboxing it in the correct order. Note the new caboose tail ligthts.
Another trip to Barrowmore in early December resulted in more progress: Firstly we had to rescue Mauch Chunk from underneath a substantial pile of baseboards – mostly associated with the O-guage Johnstown Road layout. The Barromore clubrooms only have room for one of our large layouts to be erected at a time and the others usually need to be moved round each time to accomodate this. Gavin and Richard helped erect Mauch Chunk and all was well once a connector had been partly rewired and a mysterious short had been eliminated.
Richard got down to building (soldering) the remaining fencing for the roadway on the RH side of the layout – there hadn’t been enough uprights in the original etch – and I (Steve) got on with spray painting them and drilling holes for all the uprights. Eventually Richard soldered the pieces together in situ and after a final handpaint of these parts they were done.
Dave Millwood – an S4 modeller who is new to Mauch Chunk – is rebuilding the other fencing between the roadways and track which on reflection we had decided was overscale.
I have also been preparing 24 sets of Cal-Scale Marker Lites (PR 190-375) to use on the cabooses. After removing the sprue and filing smooth, they were painted yellow. Three of the lamp sockets were painted yellow and one red as per the prototype. These were then filled with Glue’n’Glaze crystal clear (From Deluxe Maaterials) in two stages with overnight drying in between – which produced realistically shaped lenzes of the appropriate colour. Finally holes were drilled and these were fitted to the cabooses.
After all this activity, Richard and I relaxed by trying out some switching moves using a mixture of fixed undertrack magnets and the big hand in the sky. This latter will hopefully be at least partially replaced with Subarishi smart-couplers before Glasgow in late February.
The visit to Barrowmore with the caravan took place and the camelbacks and the H1 were decalled with liberty heralds. Unfortunately painting with a matt varnish resulted in white deposits which will need to be disappeared during weathering. Decalling some of the next phase of cabooses (another half dozen) was more succesful.
I also attempted to start building the post office, but a long time having elapsed since my last buildings were constructed (ten years?!?) resulted in a degree of incompetence that made me yearn for something more reliable. I have therefor embarked on planning to get at least the framework cut with a laser cutter. Should this prove succesful it could result in the purchase of a laser cutter by Barrowmore MRG at some point in the future.
Locally I have been attending the East Riding Finescale Modellers group in Hull. A fine bunch of fellows who seem to manage to model to a high standard by the expedient of standing round chatting and drinking tea – I expect to be enlightened some time soon!
Most recently I resorted to the kitchen table to finish decalling the latest cabooses (modified from generic NE cabooses), adding roof grab irons and painting their roofs. Just the tail lamps to add to a selection and they’re ready for Model Rail Scotland in February.
Since the last post I (Steve) have moved house to the East Riding of Yorkshire and this has somewhat impacted my modelling opportunities. The layout was taken down in early July and will probably not be put up again until December to allow modelling on the boards prior to exhibiting at Model Rail Scotland.
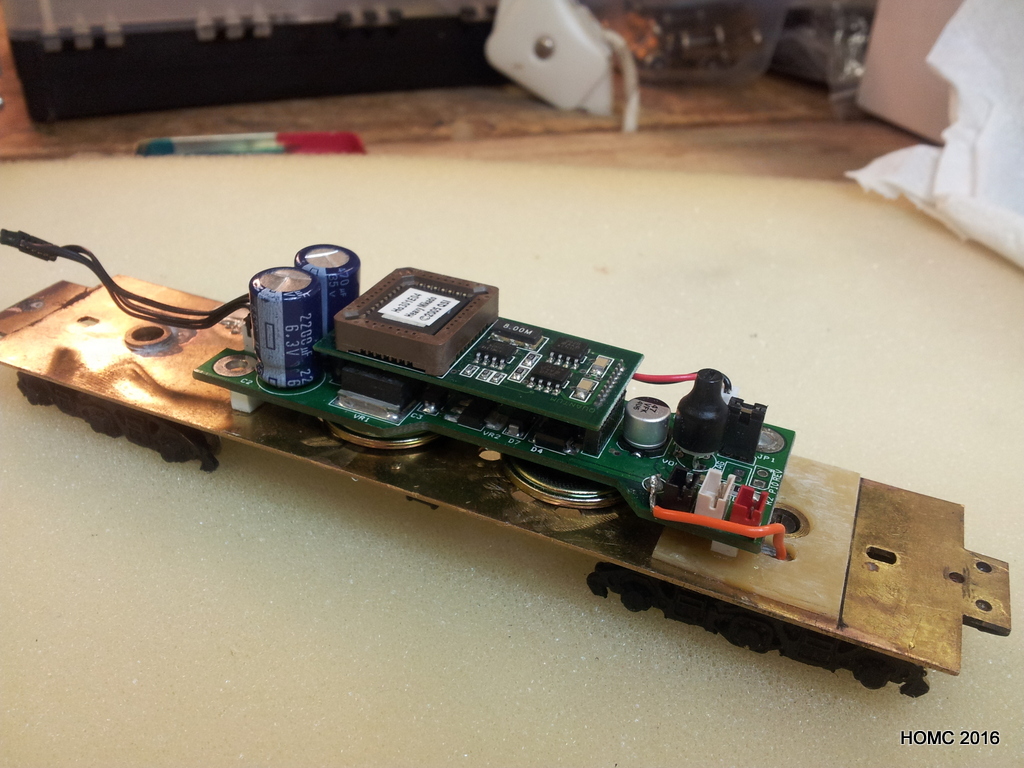
However, there is no holding Gavin back: He has worked on the motors and DCC chips of two of my camelbacks still in the original brass – a 4-6-0 L by Red Ball and an 0-6-0 B4 by Overland Models. These still need decaling and weathering which I will do on a visit back to the Barrowmore clubrooms hopefully in September (taking our new, well 2004, caravan!).
The 4-6-0 will supplement our existing 4-6-0 on (mainly teminating) passenger train duties. The 0-6-0 was not a regular visitor to Mauch Chunk, but will be used for switching around the goods shed and in the coal sidings at the Western end.
In the meanwhile, enjoy these photos – also seen on the BRMG facebook page.
Mostyn is to be exhibited at Alexandra Palace (London) towards the end of March, so most work stopped on Mauch Chunk during the period leading up to this.
Some work has been going on: I have rewired the board connectors on the four ‘old’ large scenic boards using 12-way Mat-N-Lok connectors as with the rest of the layout. This brings all the wiring to the same standard.
Passenger and parcel stock has been re-Kadeed to allow for closer and more reliable level coupling. We have also started to add corridor connectors. Seven more cabooses are beeing worked on to have their eighth window removed and will then be repainted and decalled.
Finally the Mauch Chunk boards, on their trolleys, were stacked underneath the O-Gauge ‘Johnstown Road’ layout while Mostyn was put up.
Phil Sutton, a BMRG member from the soft south of England, came up to the clubrooms for four days to service and chip the poorest running CNJ loco stock. He came in his rather flashy jaguar but still managed to do a brilliant job of a selection of the diesels including double enders and babyfaces. He is apparently allergic to steam locos, although he had a good go as you can see, fixing three K1as camelbacks.
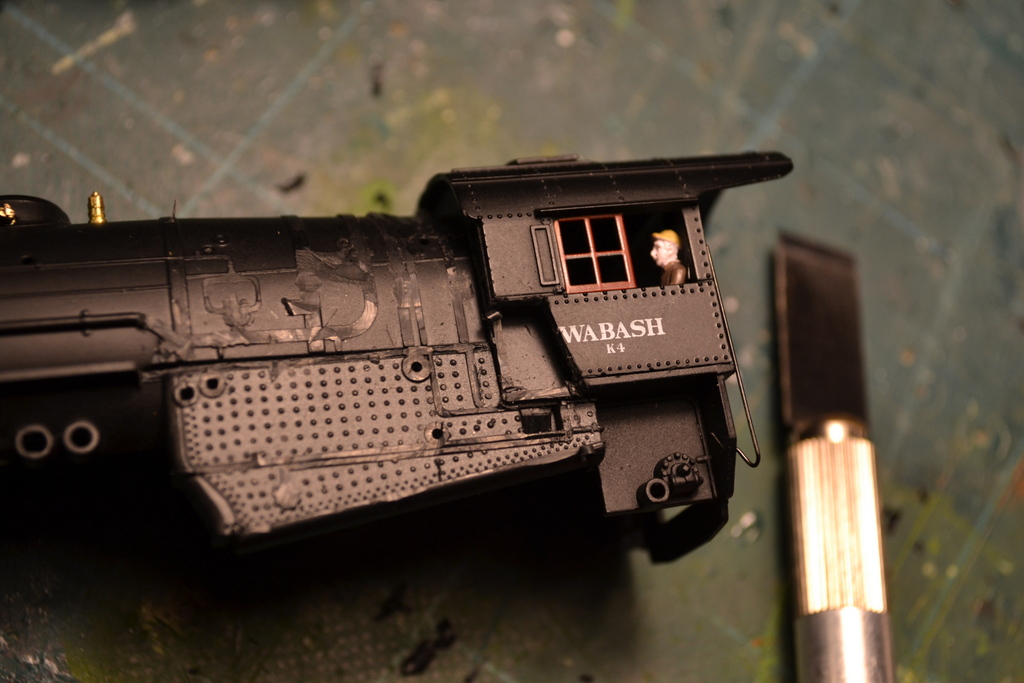
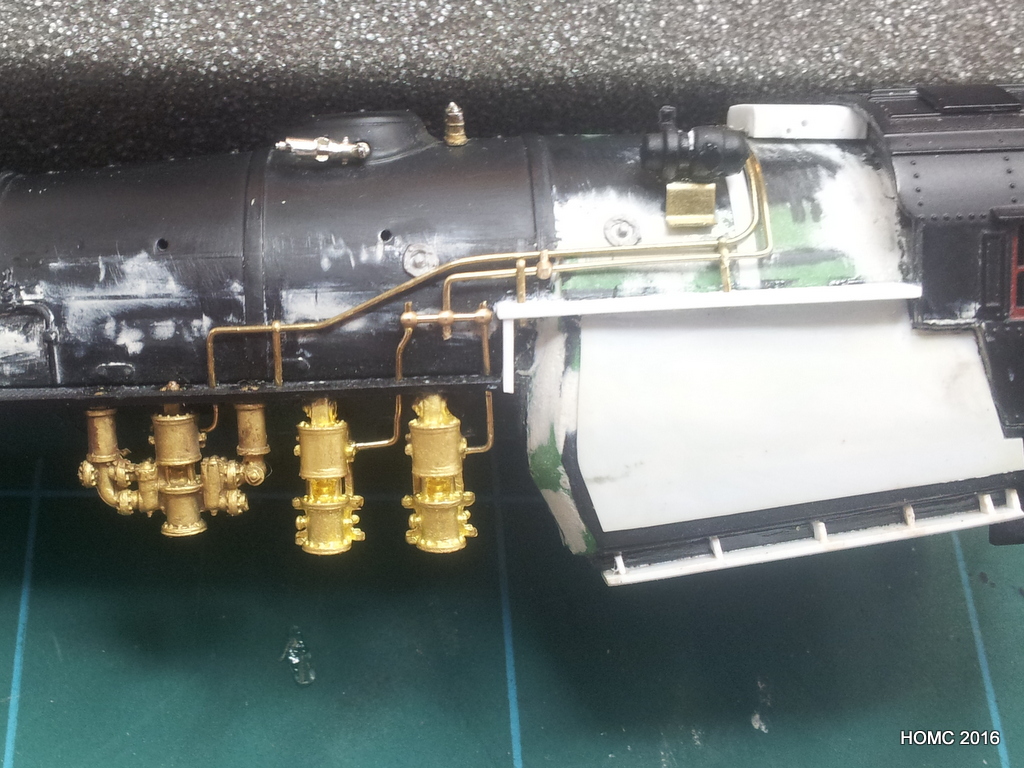
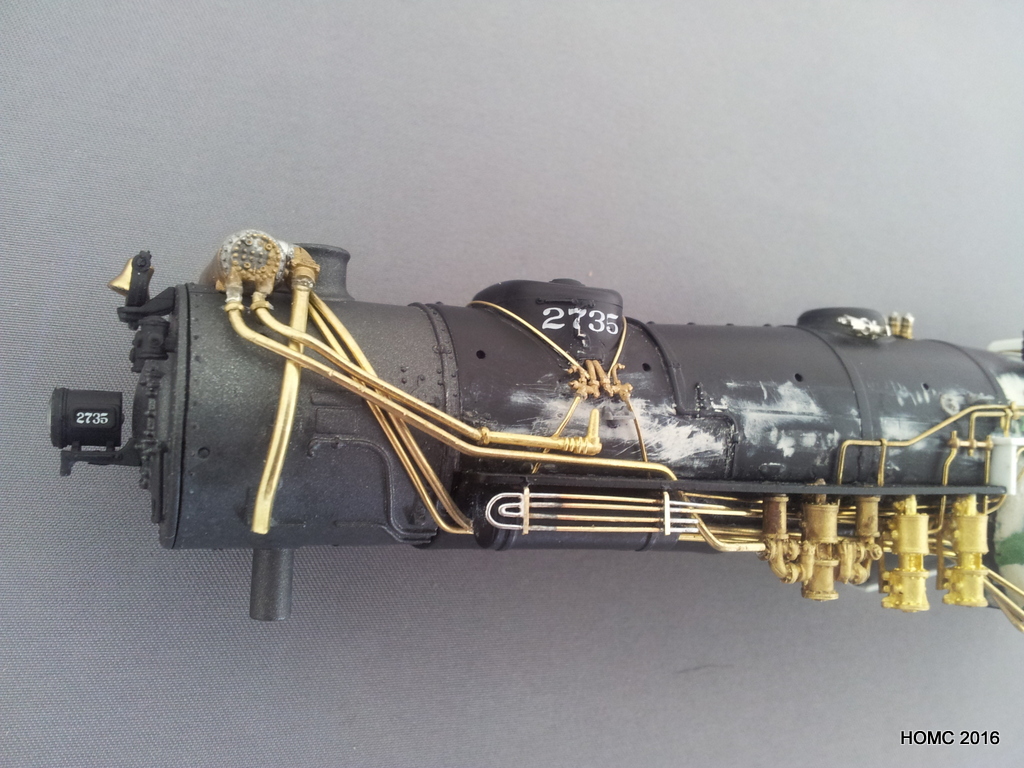
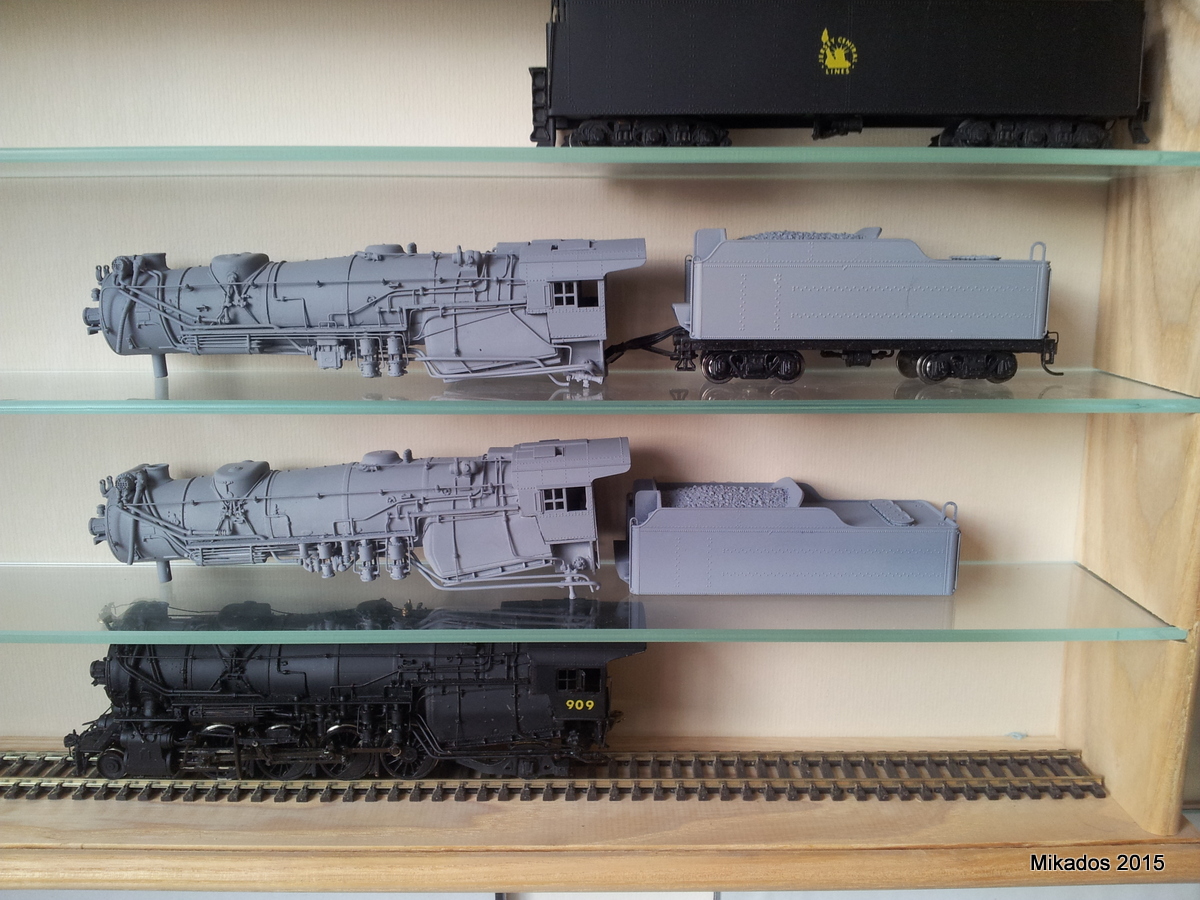
At the Barrowmore club, work on the Mikados was carried out by Steve, starting with the kitbashes originally worked on by the (late) Chris Bennett and Steve. The full details of the assembly will be placed in a project page, but in the meanwhile, please download the full instructions as a pdf here. Here are a few photos from the construction:
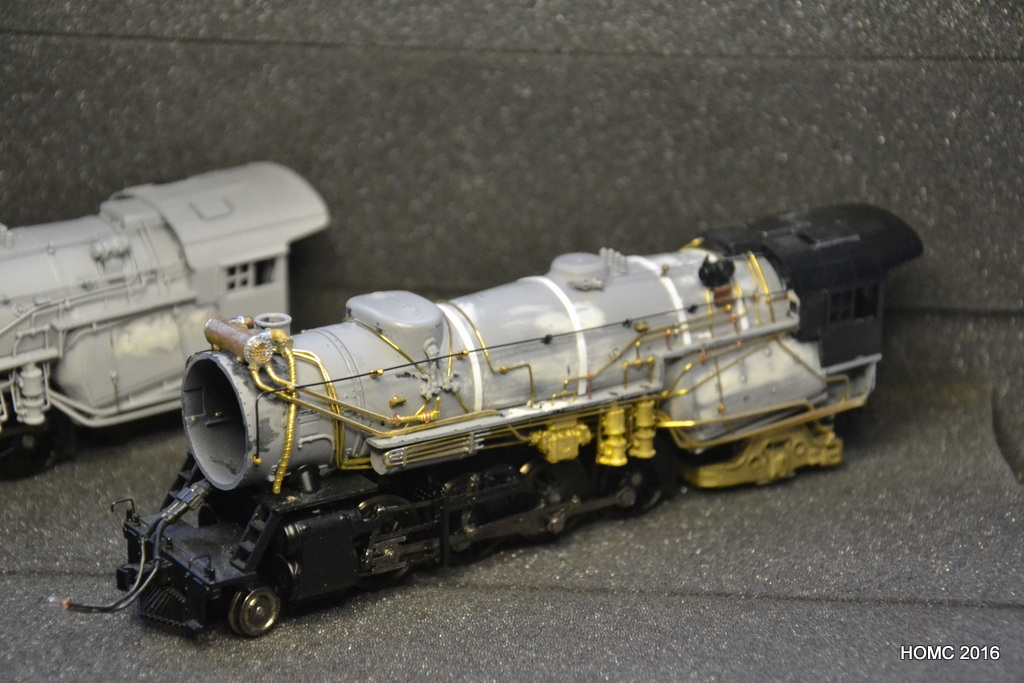
In this final photo a complete kitbash sits in front of a BLI brass equivalent.
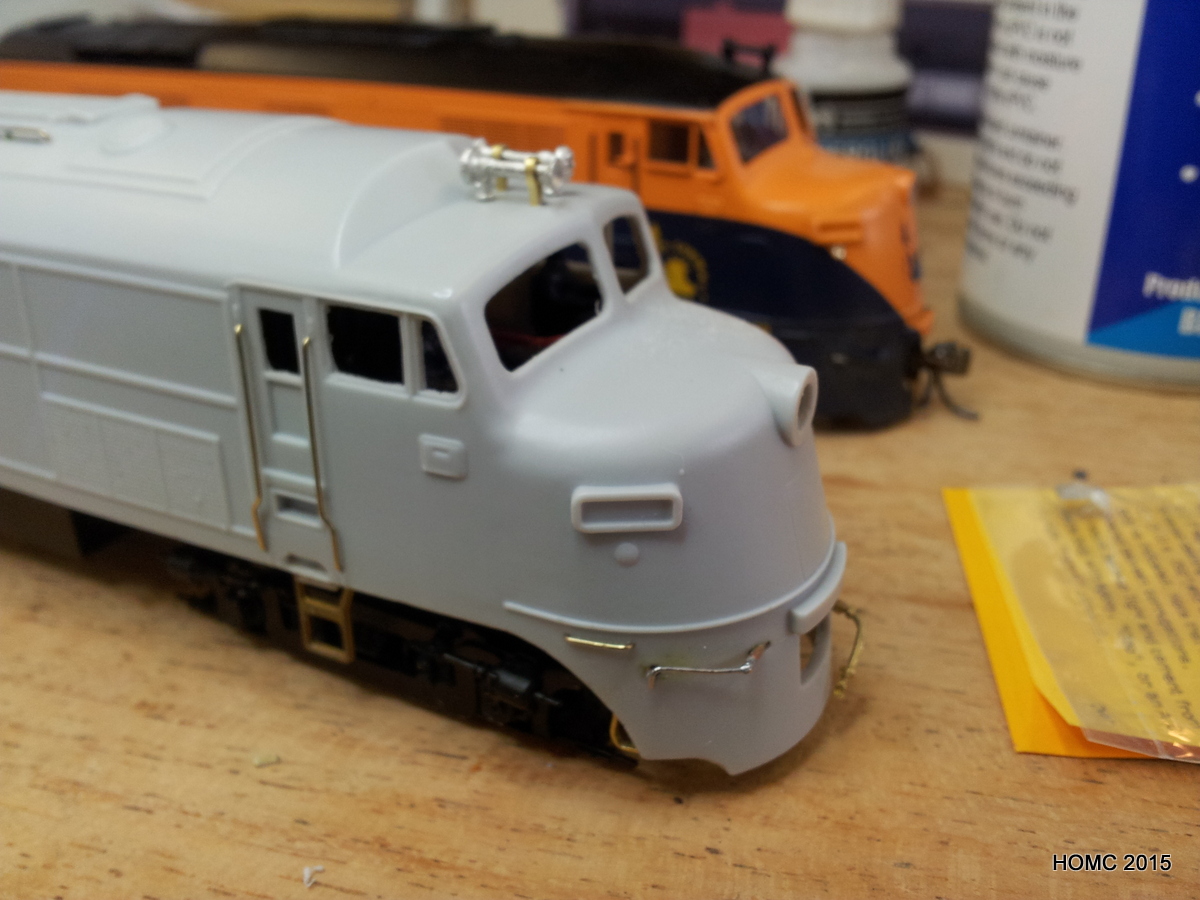
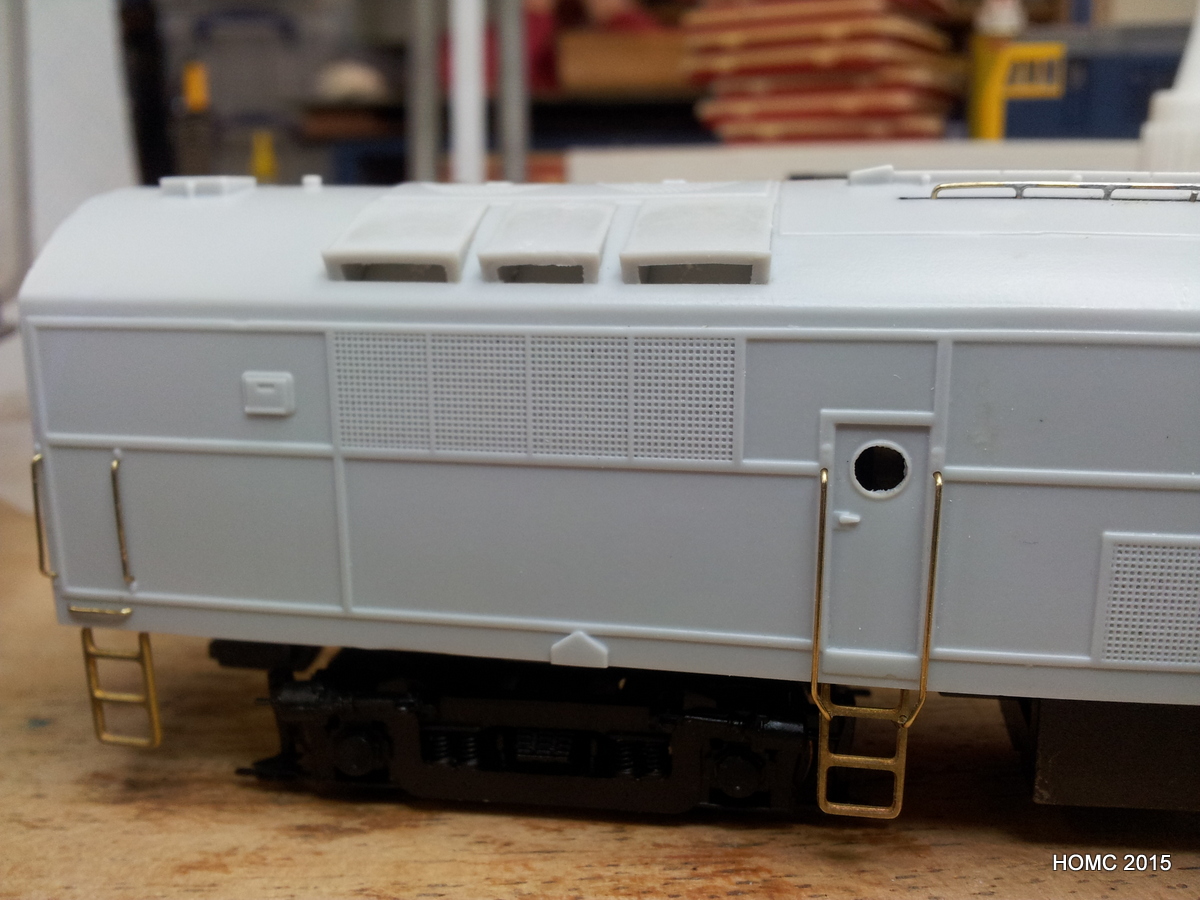
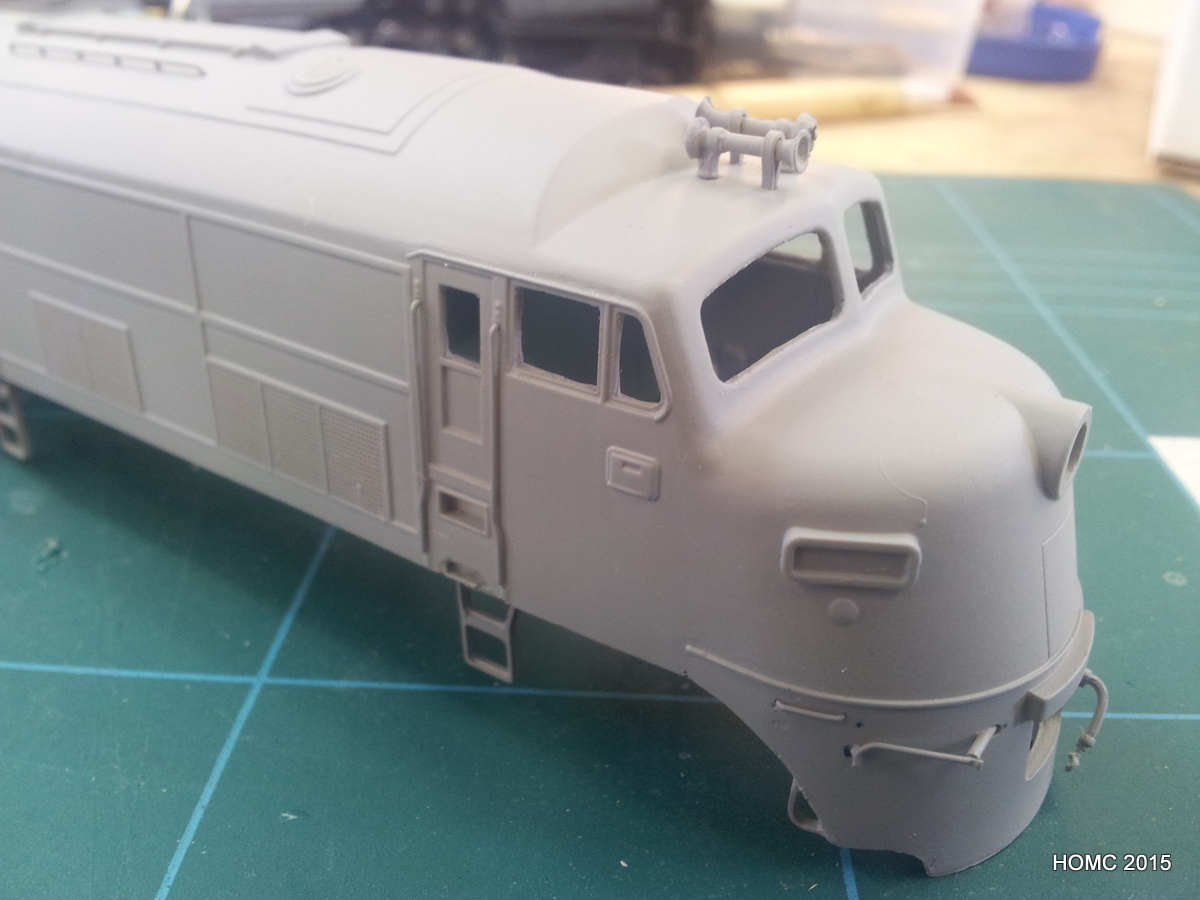
Another result of this resolution was a visit by Steve to the local Barrowmore Model Railway Group, which turned into a membership there. The BMRG is way ahead of the Merseyside club in stock building and Steve’s first project there was to build the ARHS Babyface A-B-A set that were sitting in boxes in a cupboard. This was mainly a case of adding grab irons and other ironwork. The most complex piece was a roof rail, which was build by Richard Oldfield. The final shot shows the effect of priming ready for painting – which will be done in the new year. I should comment that fitting the recommended underframe from Proto 2000 Alco FA2s into these bodyshells required a lot of grinding away of the weight and also the insides of the bodyshell. One of the bodyshells was so thin in one spot, that it blistered when painted, and has to be rebuild with plasticard and superglue. However, these little obstacle are to be expected when kitbashing and building!
Steve then moved on to kitbashes of two M3 Mikados from BLI USRA Mikados – a project started several years ago with the late Chirs Bennett. This is now nearing completion and will appear on the project page once finished! Just one photo as an appetiser – the complete model at the bottom of the shot is an Overland brass M3s.
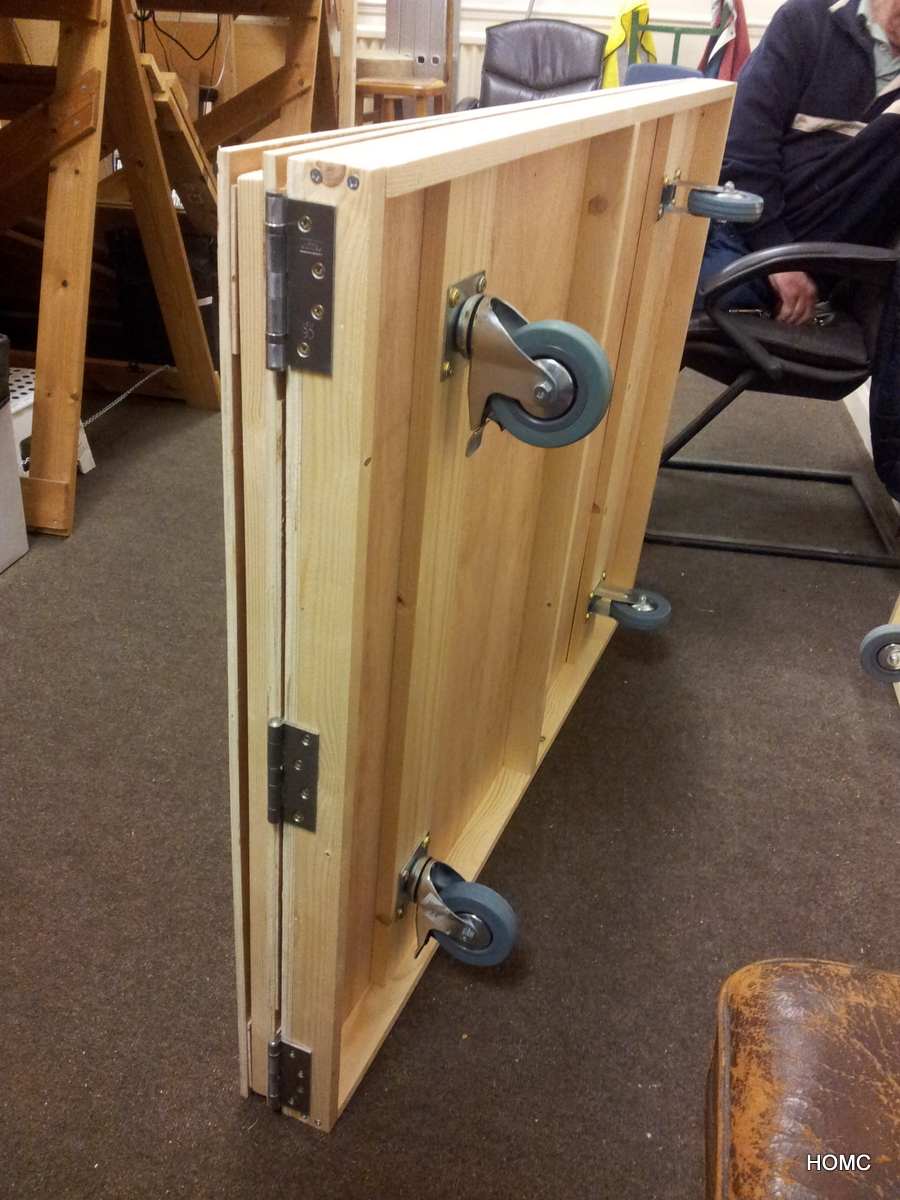
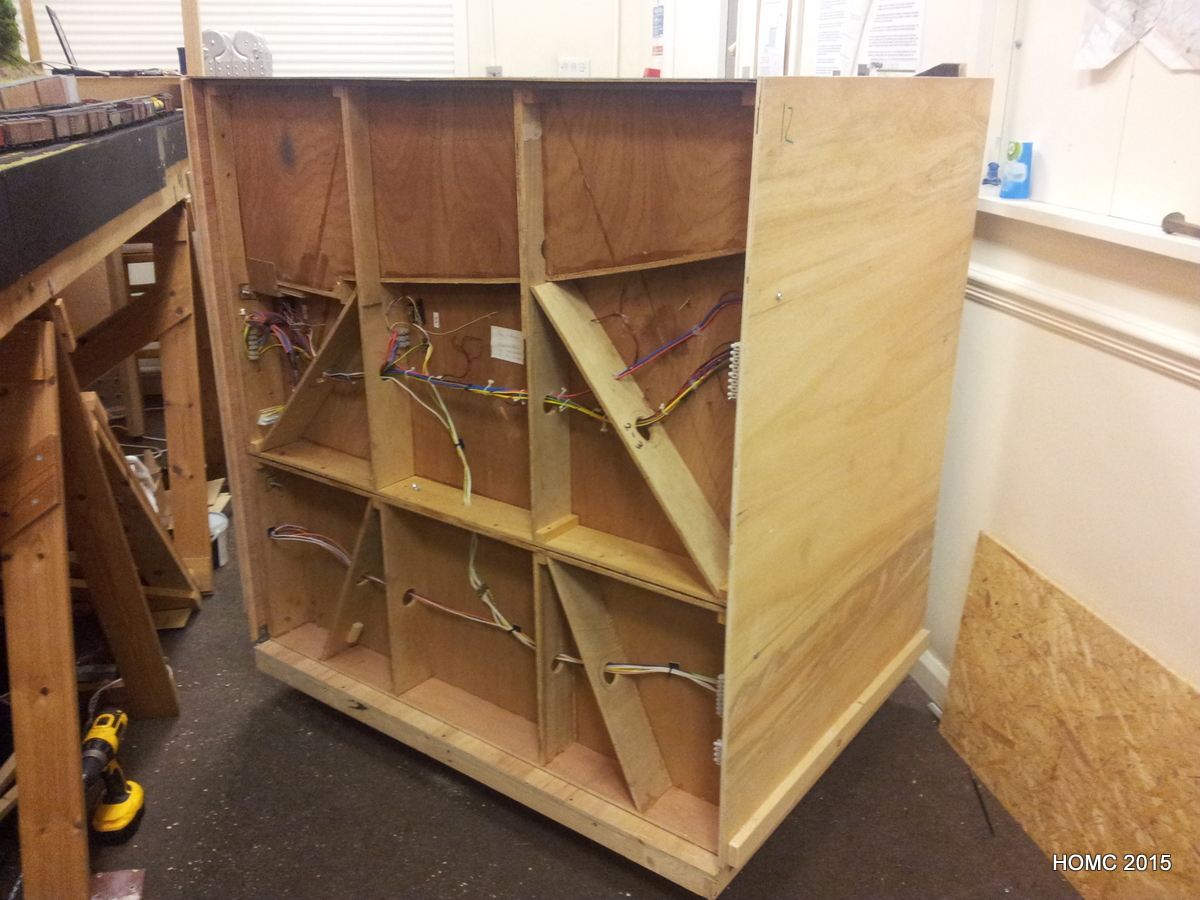
Meanwhile, back at the Merseyside club, construction of three trolleys was underway by Gordon and Steve: The new 4ft by 4ft baseboards are so heavy that they cannot realistically be carried any distance as when moving them to an exhibition. Therefore plywood trolleys are being built that can be wheeled from the clubhouse into a van (with a tail lift) and then from the van into the exhibition hall on arrival. Two of the trolleys each take two front boards, and the third takes all five staging yard board. This last is still under construction, but the first two are now complete.